TLS 1.3 released after a decade of TLS 1.2 and it took about 28 drafts to finally get define by IEFT(Internet Engineering Task Force).
TLS 1.3 has countless advantages over its predecessors, which is faster and more secure including a handshake and rebuild cipher suites.
Know everything about TLS 1.3 – Fast and more Secure than its previous versions.
Considering that TLS 1.3 is much faster and more secure, you may want to enable TLS 1.3 on your servers such as Nginx, Apache, Tomcat, Cloudflare and many more.
So, we would like to provide you with the steps on how to enable TLS 1.3 on Nginx, Apache, Tomcat, and Cloudflare.

While enabling TLS 1.3 on Nginx, keep in mind that your Nginx version should be 1.13 and further.
It won’t support on Nginx version which is below 1.13. Kindly first upgrade your Nginx with version 1.13+.
The default configuration should look like the below image under SSL settings.


The above configuration will allow TLS 1/1.1/1.2/1.3.
If you wish to enable the secure TLS 1.2/1.3, then your configuration will look like:


While enabling TLS 1.3 on Apache, keep in mind that your Apache version should be 2.4.38 and further.
It won’t support on Apache version which is below 2.4.38, you simply must upgrade it first.
Let’s look at the steps….

<!-- Define an SSL Coyote HTTP/1.1 Connector on port 8443 -->
<Connector
           protocol="org.apache.coyote.http11.Http11AprProtocol"
           port="8443" maxThreads="200"
           scheme="https" secure="true" SSLEnabled="true"
           SSLCertificateFile="/usr/local/ssl/server.crt"
           SSLCertificateKeyFile="/usr/local/ssl/server.pem"
SSLVerifyClient="optional" SSLProtocol="TLSv1+TLSv1.1+TLSv1.2+TLSv1.3"/>Cloudflare enables it by default for all the websites. However, if you need to disable or check, then here is how you can do it.

Below are some of the tools, which help you to check the supported TLS version that is enabled on your web server.
Here are a few tools to look out for:
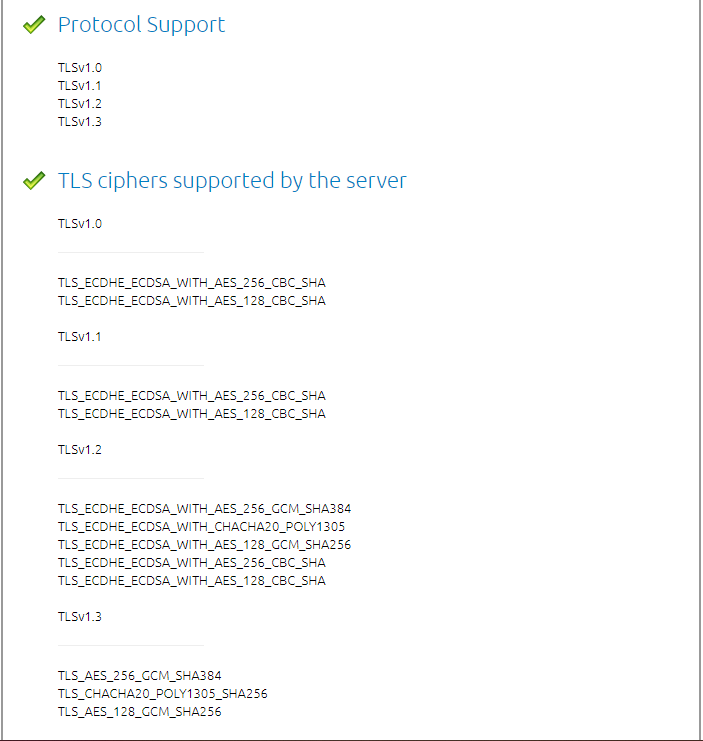
SSL Labs– enter your HTTPS URL and scroll down on the test result page.

You will see what all protocols are enabled.
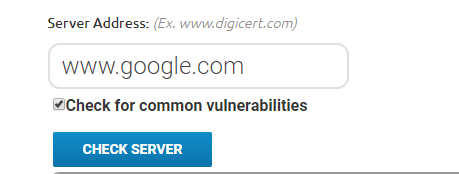
DigiCert’s SSL Installation Diagnostics Tool – enter your HTTPS URL in the Server Address box and make sure you check the box “Check for common vulnerabilities” and click on “Check Server”.
As we keep our mobile application up-to-date similarly, we must keep the TLS protocol up-to-date. TLS 1.3 is much faster and more secure in terms of its predecessor. If you haven’t enabled the latest version of TLS, then its time for you to enable it now.
If you have any trouble or question regarding SSL, kindly contact us. We are Happy To Help!